
Overview – Web Form Filling Using MuleSoft RPA
There are numerous use cases that show how Organizations can commonly benefit from automating the completion of online Web forms. This post will show how simple it is to fill out Web forms using MuleSoft RPA, and in a subsequent blog article, I will show how to easily set up Salesforce to do this RPA-based form entry. (Salesforce will even get updated with the RPA process’s output data!) So join me as I walk you through the steps needed for Web Form Filling Using MuleSoft RPA Builder below.
Set up Activity Parameters
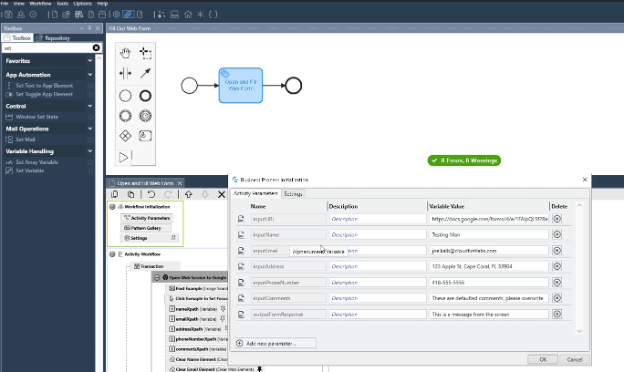
Our example shows a process with 7 activity parameters; 6 of these are to be provided as inputs to the process, and 1 of them gets set as an output from the process. (An activity parameter can be used to serve input purposes, output purposes, both, or neither, but in this case, each one is useful specifically just for input or for output.) The values for these activity parameters can be defaulted from RPA Builder:
Set XPath Variables
As shown in the screenshot above, my RPA process has a few XPath-related variables set. These XPath variables (nameXpath, emailXpath, etc.) hold the XPaths to navigate to a given field within a Web page. For some Web pages, these XPaths are easy to find and can even be done using RPA Builder’s handy Browser Wizard. For some Web pages with more complex UI’s (with a vastly complex set of HTML elements used to build out the screen), it may take some experimentation using Chrome Developer Tools to figure out the appropriate XPath to use to navigate to a given field on a Web page. An example Xpath variable value from the example RPA process is:
- nameXpath = //span[text() = ‘Name’]/parent::div/parent::div/parent::div/parent::div//input
These XPath-related variables are set so they can be used in later action steps: one step to clear any data out of said field, another step to write the new value into said field.
Clear Web Elements
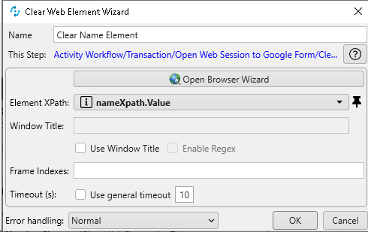
Now that the XPath elements are set up, add a “Clear Web Element” action step for every field that might need data cleared out. This can be important in case the field comes pre-populated for one reason or another:
Click Web Element and Enter String
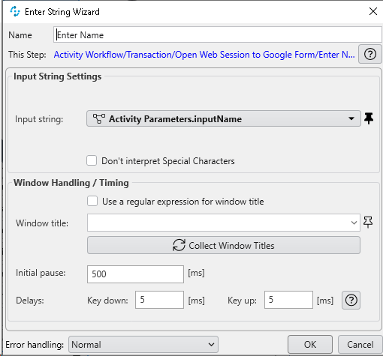
The next steps are to Click Web Element and Enter String. Click Web Element will bring focus to the relevant field (based on the XPath-related variable set earlier). The Enter String gets configured with the appropriate activity parameter value.
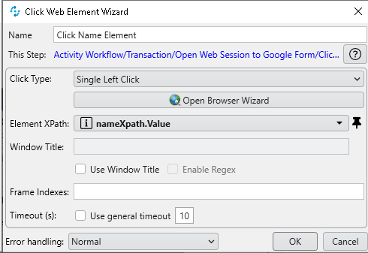
After doing this for each relevant field, it is now time to use one more Click Web Element to submit the Web form:
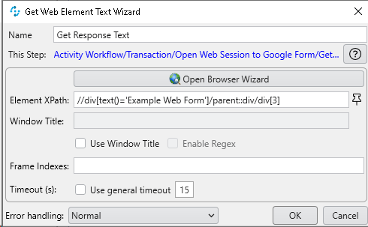
Get Response Text
After clicking Submit, the RPA process gets taken to a new Web page. From this Web page, the RPA process will capture some text from the screen using a Get Web Element Text action step using XPath:
The following step is a Set Variable so that the value from that Web element can be set on an activity parameter (outputFormResponse, in this example’s case):

This sets the response on that activity parameter, allowing it to be referenced by invokers of this RPA process. (As we will see in Part 2 of this series, Salesforce [or another system] can kick off this RPA process and use the data from the outputFormResponse activity parameter).
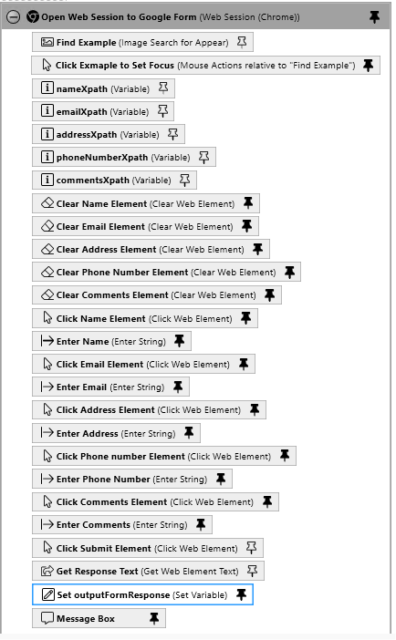
After configuring this setup for the example Web form (and the input/output fields therein), the RPA process in RPA Builder looks like what is shown in the following screenshot:
Conclusion – Part 1
By following this example, you can see how easy it is to complete Web Form Filling Using MuleSoft RPA and automate Web-based data input and output, especially when you want to set it up to write to or read from Web pages. By setting up such a MuleSoft RPA process as an invokable configuration (as shown in an earlier Cloud First Labs post about MuleSoft RPA), another system can programmatically provide proper input to a Web form and utilize the output provided by the RPA process. Part 2 of this series will specifically show this capability by having a Salesforce flow use this example Web form RPA process.
A walk-through video demonstration of the steps I took can be found here on our YouTube channel:
Talk to the Professionals!
To learn more about our MuleSoft RPA, MuleSoft and EDI, or Salesforce services, please visit our website or fill out a Contact Us form here.