
Overview – What is MuleSoft IDP?
MuleSoft IDP (Intelligent Document Processing) is a relatively new functionality that enables data retrieval from disparate document types and formats. MuleSoft IDP allows these various documents to be handled in a streamlined, automated, and customizable fashion. For certain document types such as Invoices and Purchase Orders, MuleSoft IDP has out-of-the-box capability to scan the document and parse out dozens of relevant data points as part of a Document Action. Document Actions can be configured to use AI prompts to extract additional data from documents. Not only is this tool powerful to use right from the user interface in Anypoint Platform, but MuleSoft has made the tool easy to integrate with as part of an API-led solution.
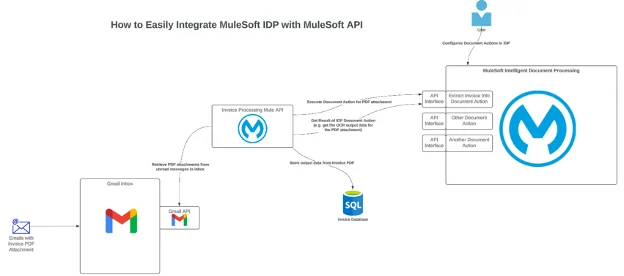
This article and accompanying video show the straightforward process for integrating an IDP Document Action into a MuleSoft-API-based orchestration. To illustrate it, this post will use the process diagrammed below, with a MuleSoft API reading PDF attachments from a Gmail inbox, sending each attachment to a “Demo Invoice Extract” IDP Document Action, and storing the resulting data found by IDP into a database. The details around this use case (e.g. Gmail inbox as source system, SQL database as target system) could easily be configured for other technologies and platforms, but ultimately shows how to properly configure a Mule application to work with MuleSoft IDP.
Configure Document Action in MuleSoft IDP
Configure the Action
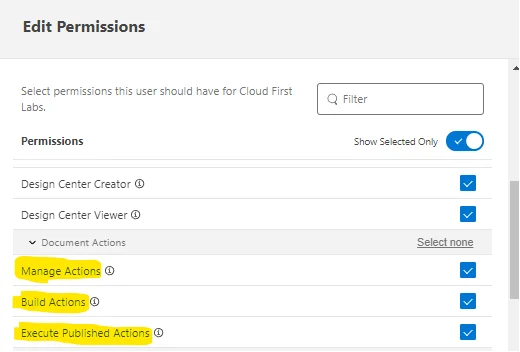
In Anypoint Platform, ensure that the organization has the entitlement to Intelligent Document Processing. Also ensure that the relevant user has the following permissions enabled in Access Management under “Document Actions” for the relevant business group(s): Manage Actions, Build Actions, and Execute Published Actions. A Document Action is the foundation for IDP and must exist before a document can be integrated:
With these permissions in place, log in to Anypoint Platform and go to Intelligent Document Processing.
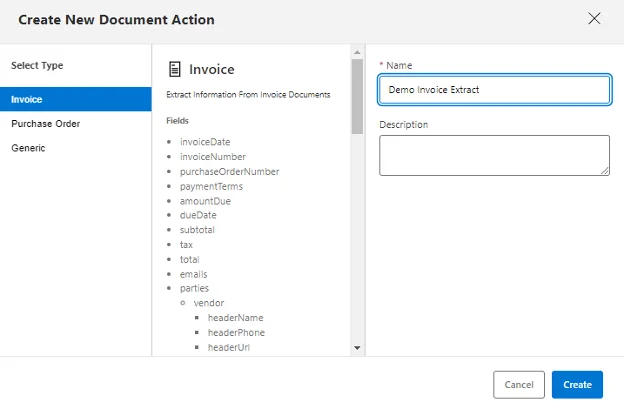
Click “Create New” to create a new action. Select Invoice and name the Document Action “Demo Invoice Extract”. Click Create:
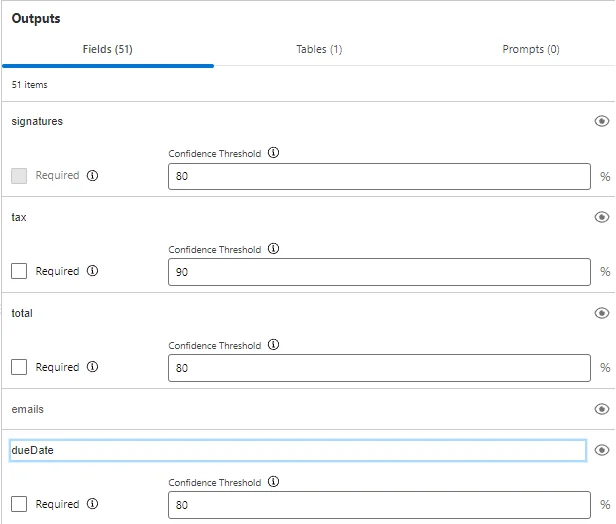
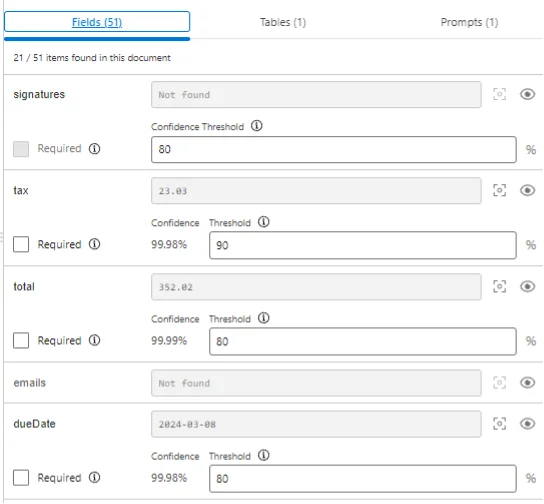
This automatically generates dozens of data fields that will be parsed by default for any provided invoice document. These fields can be configured on an individual basis to be Required (e.g. if the field cannot be extracted from a document, the document requires manual review) and the Confidence Threshold can be set (e.g. if the algorithm’s confidence score for the extracted field is below this threshold, the document requires manual review):
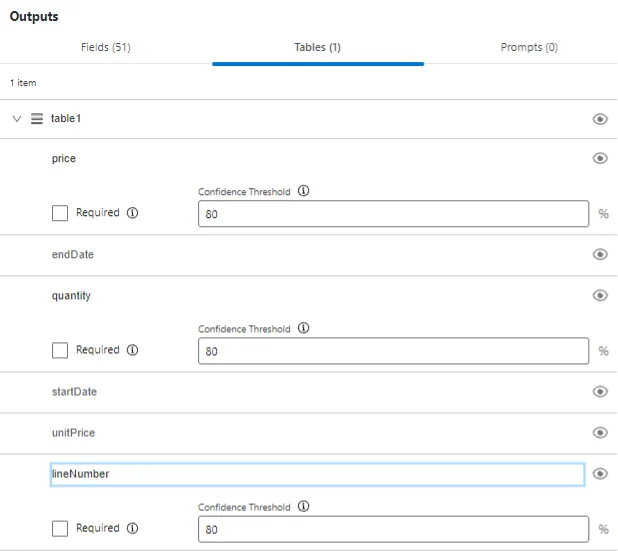
There is also a Tables section, which consists of tables of data found within such a document. For example, one invoice document can have multiple line items. Each line item could have a price, lineNumber, and a quantity, so those fields are part of a table:
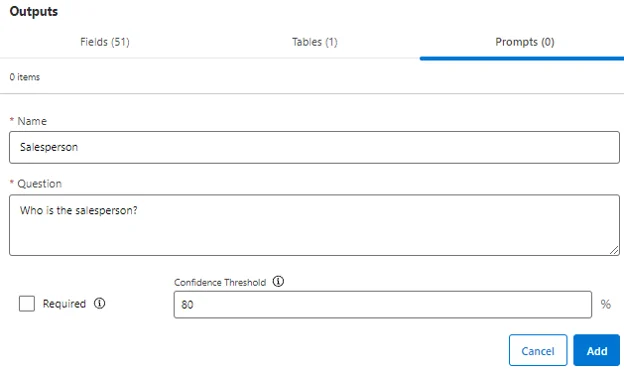
Finally, there are prompts. These prompts are defined by the user. The user asks a direct question using natural language to gather more information about the document beyond what is captured out of the box:

For this example, add a new Prompt with Name = “Salesperson” and Question = “Who is the salesperson?”. Leave the Confidence Threshold as the default 80%. Click Add:
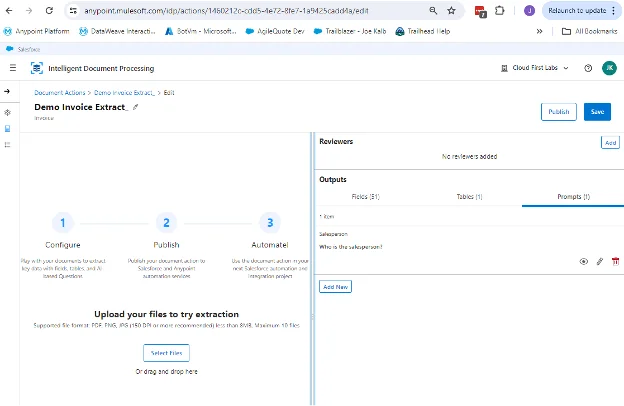
With this in place, the default Document Action is configured and ready to be tested:
Test the Action
To test the action, upload one (or more) invoice files in the “Upload your files to try extraction” section of the screen. Drag a file to the screen. A preview of the file will show:
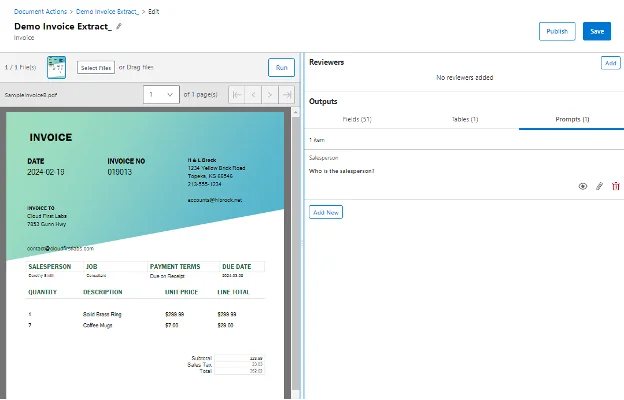
Then click Run to run the Document Action and extract the data from the document. After the extraction process runs, it shows the outputs in the Outputs section of the screen:
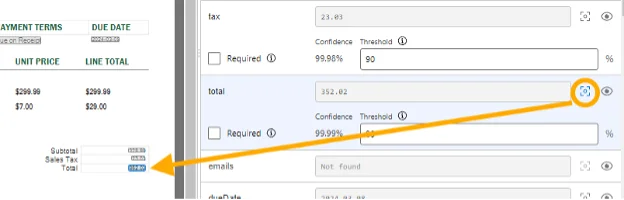
For this example, MuleSoft IDP processing (which uses AI and learns as you configure more documents), was able to automatically “match” 21 out of the 51 default fields for the Invoice document. Clicking on the icon next to the extracted value will highlight the extracted location in the parsed document:
With this Document Action successfully parsing the data as desired, click Save.
Publish the Action to Exchange
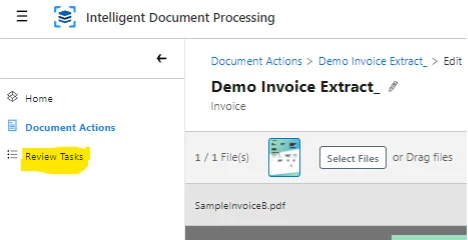
Before the action can be published, at least one Reviewer must be added to the Document Action. (If a document is scanned by a Document Action and it has extracted data with confidence scores below the Confidence Threshold, or if the extracted data is missing Required fields, the document will show up in the Reviewer user’s Review Tasks in the left-hand screen panel:
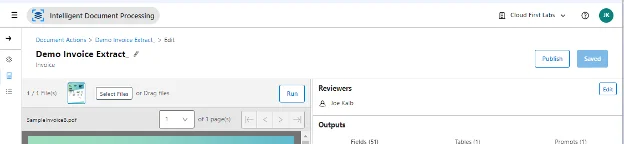
Click Add in the Reviewers section and add one or more users who will be responsible for manual review of these documents. Such users would be able to modify extracted data as they find appropriate as part of the review process:

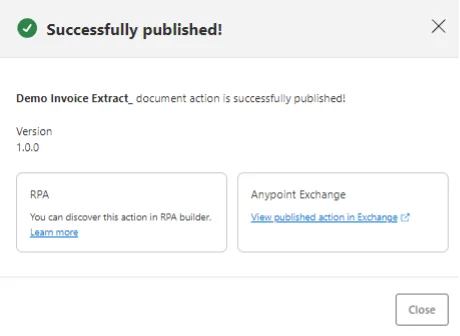
After adding a Reviewer, the Document Action is ready to be published. Click Publish:
The Document Action gets published to Anypoint Exchange:
Click the link to view the published action to see it in Exchange:
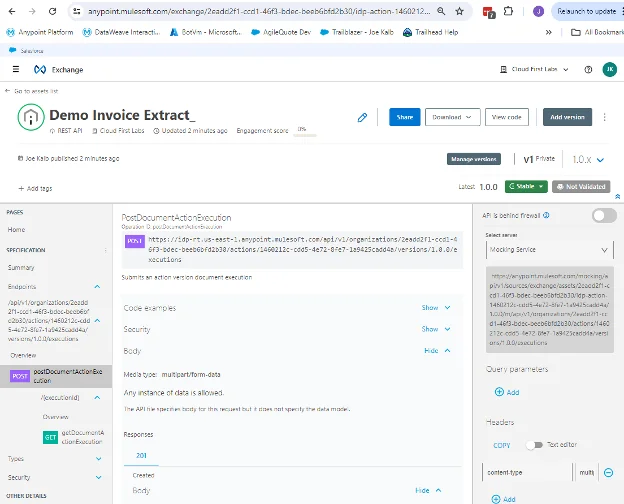
Note that an API has been generated for the Document Action with two endpoints: a POST and a GET. The POST is the one where the actual document content is sent so that IDP can extract data. However, this endpoint simply acknowledges the message, providing an execution ID while the extraction process runs in the background. To check on the status of the execution, call the GET endpoint for the provided execution ID. Initially the status is likely to be IN_PROGRESS. Upon completion of the extraction, the status will move to either SUCCEEDED (if all required fields found and all confidence thresholds hit) or MANUAL_VALIDATION_REQUIRED. Along with those statuses, all the extracted data will be provided in JSON format.
For calling this Document Action’s API from a MuleSoft application, make sure to grab the host name from Exchange (e.g. idp-rt.us-east-1.anypoint.mulesoft.com in the Exchange screenshot above). This will get configured into the Mule app later.
Additionally, to call this API, a Connected App must be created with access to call the API.
Create Connected App for Calling IDP APIs
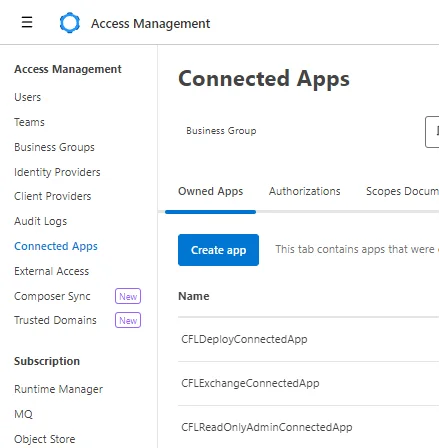
To create the required Connected App, go to Access Management. Click Connected Apps in the left-hand panel. Click Create app:
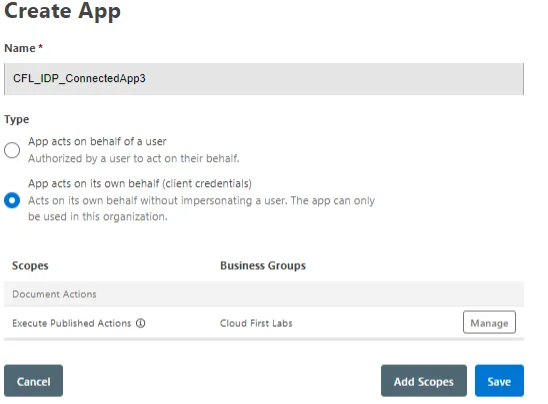
Give the app a name (e.g. “CFL_IDP_Connected_App3”) and set Type = “App acts on its own behalf (client credentials)”. Then click Add Scopes:
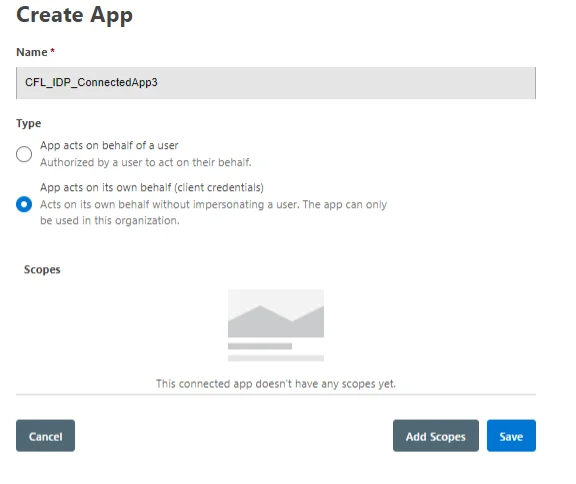
For Scopes, add “Execute Published Actions” under Document Actions:
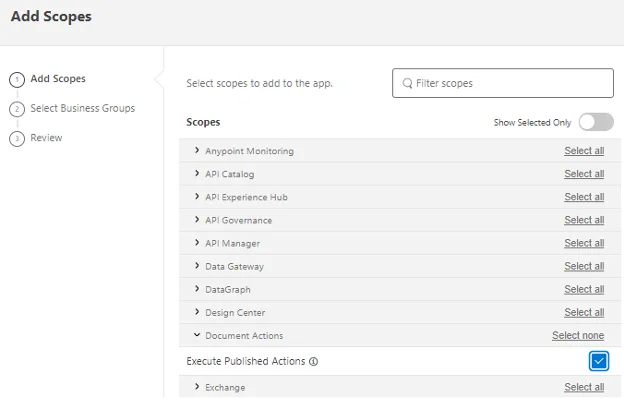
Click Next and add it to the relevant Business Group(s) and click Next again. Confirm the choices by clicking Add Scopes. Then click Save:
After saving, the Connected App will show up in the list. Gather the Client ID by clicking Copy Id and gather the Client Secret by clicking Copy Secret. These ID and Secret values will be configured into the calling Mule application because the Mule app will use these Connected App credentials to get an OAuth 2.0 token used to authenticate against this Document Action’s API:

Create Mule App to Call IDP API
Get Attachments from Email Inbox
As shown in the architecture diagram in the Overview section, this Mule application is going to get content from Gmail to provide to the IDP Document Action’s API. The Mule app uses the Gmail connector to find unread messages with PDF attachments in a specific email inbox. All found PDF attachments are then sent to the Document Action API for IDP processing.
This article does not go into detail on how to use the MuleSoft Gmail connector, but we put together a previous article and video detailing how to integrate a Mule API with Gmail using the Gmail connector. Check out that link to get more details.
Download the Document Action Connector from Exchange
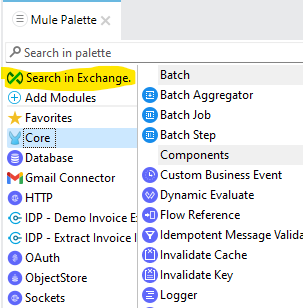
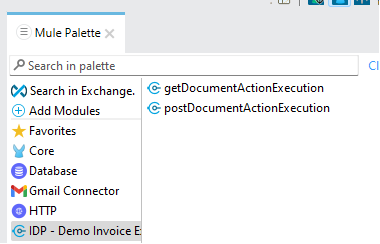
To integrate with the configured IDP Document Action, double-click Search in Exchange in the Mule Palette:
In the popup window, enter the name of the published Document Action to search for it:
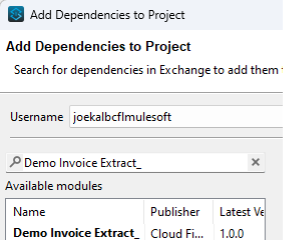
Click it and click Add to move it to the Selected modules. Then click Finish. It should now show up in the Mule Palette and have two components available to choose from: getDocumentActionExecution and postDocumentActionExecution
Configure the Document Action Connector
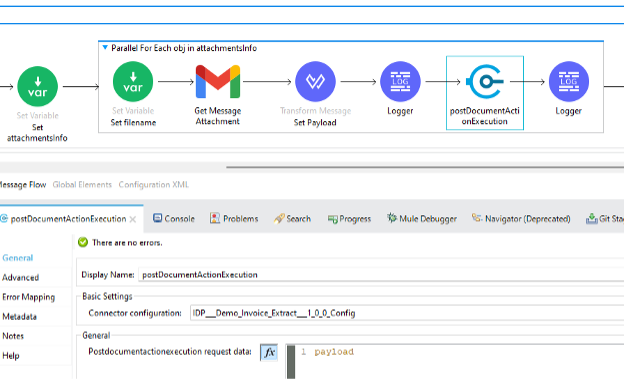
The use case requires both the postDocumentActionExecution (POSTing the document content to IDP) and the getDocumentActionExecution (GETting the IDP extraction results). In the Mule app, after getting the attachment, drag the postDocumentActionExecution component into the Mule flow:
Add (or edit, if it already exists) a Connector configuration. (The following fields should of course be controlled by property values, but for simplicity’s sake for this demo example, the screenshots show hard-coded values.) Add the host value that was noted a few sections ago from the URL in Anypoint Exchange for the Document Action’s API (e.g. idp-rt.us-east-1.anypoint.mulesoft.com). Set port = 443. Set basePath = /. Set protocol = HTTPS. Set Response timeout to 30000 (or whatever is desired). For clientId, paste the Client ID copied out of Access Management earlier for the Connected App. For clientSecret, paste the Client Secret copied out of the same screen. Leave the accessTokenURL as the default (https://anypoint.mulesoft.com/accounts/api/v2/oauth2/token):
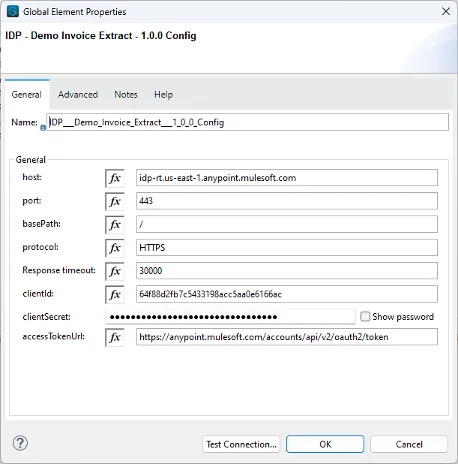
Click Test Connection… it should test successfully:

With this, the Connector configuration is complete and will be reused by both the “post” and “get” connector components.
Configure the Payload for POST Request to IDP API
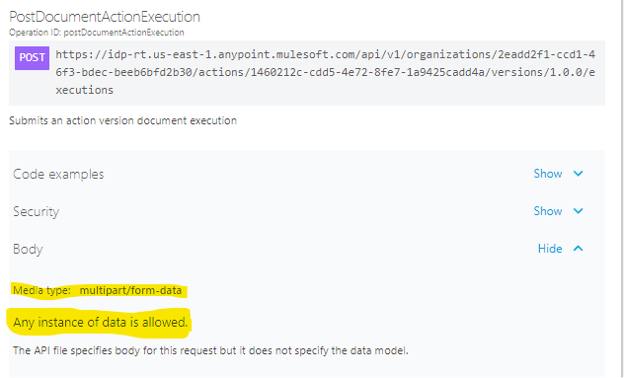
A screenshot above showed the Postdocumentactionexecution request data equalling “payload”. It is very important to note what this payload should consist of, especially because it is a little bit unclear from the Exchange documentation. As shown here, the Exchange documentation says that “Any instance of data is allowed” and that it is multipart form data:
In reality, the payload must match certain specifications. The multipart form data must have a part named “file” which holds the content, and that content should be in binary format. In the example shown here, the PDF content comes back base64-encoded from the Gmail connector in a field on a JSON payload called “data”. And the base64-encoding used by Gmail uses some different characters from what the DataWeave fromBase64 function is expecting. For that reason, there are a few “replace” commands attached in the DataWeave shown here. (The article that led to inclusion of this is here; it was found as part of troubleshooting an “illegal base64 character 2d” error.) Anyway, here is a screenshot of the Set Payload Dataweave component:
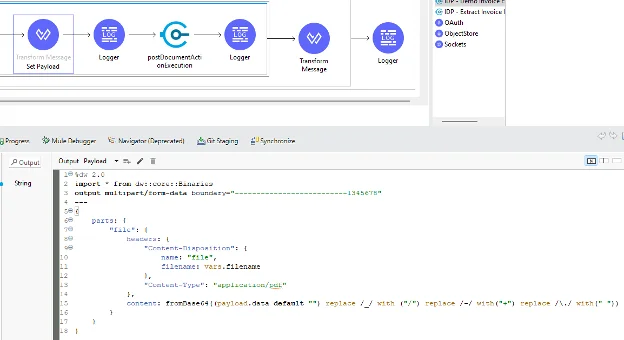
And here is the DataWeave content:
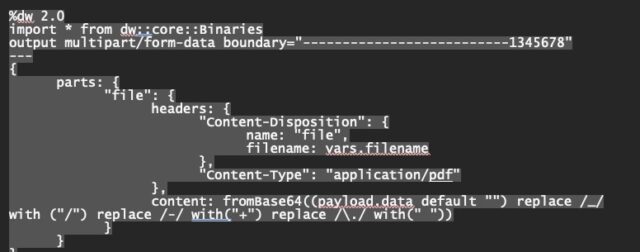
The key points are:
- The request data should use multipart/form-data
- The content should go inside the parts element with a part named “file”
- The content’s filename should be passed under file -> headers -> Content-Disposition -> filename.
- The content should be in binary format as opposed to being sent as a base64-encoded string.
This flow is now set up to send the correct data to the IDP Document Action API for data extraction.
Configure the Execution ID for GET Request to IDP API
The postDocumentActionExecution receives back a JSON payload with the id (e.g. ec76f45a-a205-44a9-9a0c-af46abbd2208) and documentName (e.g. SmallPDF.pdf), as shown in a direct Postman call below:
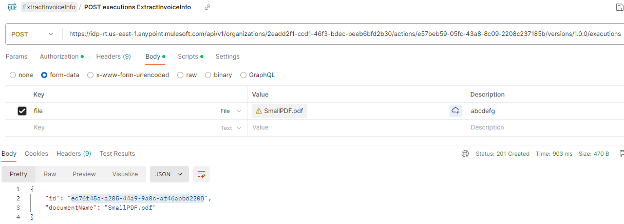
Save this id field somewhere so that it can be used for the follow-up GET call(s) to get the actual IDP-extracted data.
The configuration for the follow-up GET call is very simple; just provide the execution ID as an input:
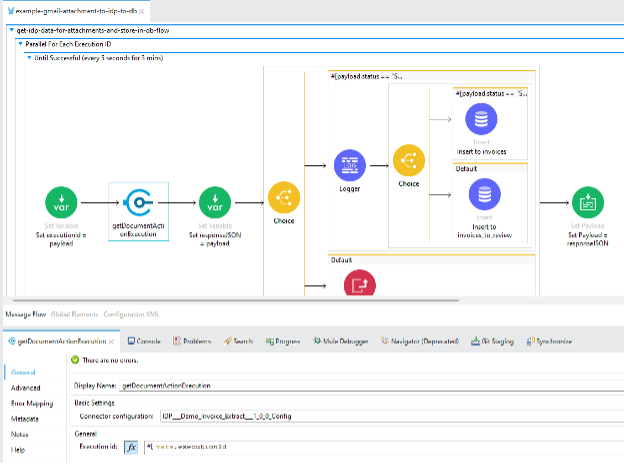
This will successfully enable the Mule app to call to get the extracted data. However, as shown in both the video and the screenshot above, there is an Until Successful scope in place for this action. This is because there is no “Do While” loop in MuleSoft but “Until Successful” can serve a similar need. In this case, the app continues calling the getDocumentActionExecution until the background processing is complete. (In other words, it checks every 5 seconds to see if the returned status is IN_PROGRESS or if it is SUCCEEDED or MANUAL_VALIDATION_REQUIRED.)
Handle the IDP Output JSON Data
Once the processing is complete and the status is either SUCCEEDED or MANUAL_VALIDATION_REQUIRED, the response data from getDcumentActionExecution will contain the IDP output JSON data. This JSON data is the extracted data from the passed-in document content. As shown in the screenshot above, this simple app is just storing extraced data in database tables. But this data could be passed on to any relevant systems thanks to the power and easy integration ability provided by MuleSoft. Below is an example of IDP Output JSON data:
{

    "id": "e315f963-553a-4e07-9bc8-742d99d04629",

    "documentName": "SampleInvoiceC.pdf",

    "status": "SUCCEEDED",

    "pages": [

        {

            "page": 1,

            "fields": {

                "invoiceDate": {

                    "value": "02/25/2024"

                },

                "invoiceNumber": {

                    "value": "971"

                },

                "purchaseOrderNumber": null,

                "paymentTerms": {

                    "value": "Due on receipt"

                },

                "amountDue": null,

                "dueDate": {

                    "value": "03/01/2024"

                },

                "subtotal": {

                    "value": "400.00"

                },

                "tax": {

                    "value": "20.00"

                },

                "total": {

                    "value": "420.00"

                },

                "signatures": null,

                "emails": null,

                "parties": {

                    "vendor": {

                        "headerAddress": {

                            "value": "CREATE & CO. 123 MAIN ST. I SEATTLE, WA 78910"

                        },

                        "headerName": {

                            "value": "CREATE & CO."

                        },

                        "headerPhone": {

                            "value": "111-222-3333"

                        },

                        "headerUrl": null,

                        "address": {

                            "value": "CREATE & CO. 123 MAIN ST. I SEATTLE, WA 78910"

                        },

                        "street": {

                            "value": "123 MAIN ST."

                        },

                        "city": {

                            "value": "SEATTLE,"

                        },

                        "state": {

                            "value": "WA"

                        },

                        "zipCode": {

                            "value": "78910"

                        },

                        "country": null,

                        "name": {

                            "value": "CREATE & CO."

                        },

                        "addressBlock": {

                            "value": "123 MAIN ST. I SEATTLE, WA 78910"

                        }

                    },

                    "buyer": {

                        "headerAddress": {

                            "value": "Cloud First Labs\n7853 Gunn Hwy\nTampa, FL 33626"

                        },

                        "headerName": {

                            "value": "Cloud First Labs"

                        },

                        "headerPhone": null,

                        "headerUrl": null,

                        "address": {

                            "value": "Cloud First Labs\n7853 Gunn Hwy\nTampa, FL 33626"

                        },

                        "street": {

                            "value": "7853 Gunn Hwy"

                        },

                        "city": {

                            "value": "Tampa,"

                        },

                        "state": {

                            "value": "FL"

                        },

                        "zipCode": {

                            "value": "33626"

                        },

                        "country": null,

                        "name": {

                            "value": "Cloud First Labs"

                        },

                        "addressBlock": {

                            "value": "7853 Gunn Hwy\nTampa, FL 33626"

                        }

                    }

                }

            },

            "tables": {

                "table1": [

                    {

                        "unitPrice": {

                            "value": "15.00"

                        },

                        "quantity": {

                            "value": "10"

                        },

                        "unitOfMeasure": {

                            "value": null

                        },

                        "price": {

                            "value": "150.00"

                        },

                        "description": {

                            "value": "20\" X 30\" hanging frames"

                        }

                    },

                    {

                        "unitPrice": {

                            "value": "5.00"

                        },

                        "quantity": {

                            "value": "50"

                        },

                        "unitOfMeasure": {

                            "value": null

                        },

                        "price": {

                            "value": "250.00"

                        },

                        "description": {

                            "value": "5\" X 7\" standing frames"

                        }

                    }

                ]

            },

            "prompts": {

                "Salesperson": {

                    "prompt": "Who is the salesperson?",

                    "source": "document",

                    "answer": {

                        "value": "Oscar Ward"

                    }

                }

            }

        }

    ]

}
***See the video for how this output was handled and what the resulting database content looked like for a set of 3 disparate invoice documents.
Check out the video for this blog to see how easy document processing can be, as well as other tips, tricks and nuggets regarding MuleSoft IDP”
Conclusion
MuleSoft IDP enables quick and strong data extraction capabilities with straightforward configuration. This intelligence, using out-of-the-box functionality and the ability to leverage AI to glean further insights, can be easily plugged into many MuleSoft API-based solutions, or other technology such as Salesforce Flow. With some simple configurations, MuleSoft can set up organizations for success in a wide variety of automation, document processing, and integration use cases.
Talk to the Professionals!
To learn more about our MuleSoft IDP, MuleSoft RPA, Partner Manager and EDI, or Salesforce services, please visit our website or fill out a Contact Us form here.