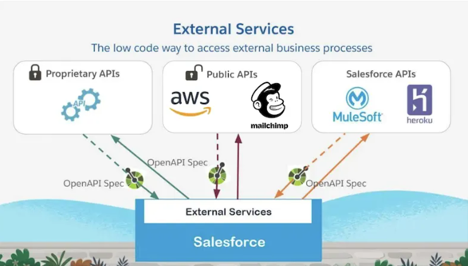
Salesforce is the hub
We all know that if the data isn’t in Salesforce, it doesn’t exist. But we also know most companies don’t work exclusively in Salesforce. So how do we bridge that gap? Previously, connecting to outside systems required extensive Apex coding, utilizing MuleSoft and other third-party integrations – skills beyond that of declarative admins and developers. Enter – External Service Integrations!
Understanding Salesforce External Services
External Services in Salesforce is a powerful feature that allows Salesforce to connect with external APIs without requiring extensive coding. This feature simplifies the process of integrating third-party services and data into Salesforce, making it more accessible for users who may not have deep technical expertise in coding or API integrations.
With the power of external service integrations, users get increased efficiency from automated data handling and time-saving workflows that improve data integration. External services can connect to a wide variety of systems, and can allow real-time syncing, centralizing data, – allowing Salesforce to be the ultimate source of truth!
As the world’s #1 CRM, the customer always comes first. This cost-effective, low to no-code integration can enrich the quality of those customer interactions and support decision making on time. I’m sure you’ve heard enough about how amazing External Services can be, so it’s time to show you what it can do!
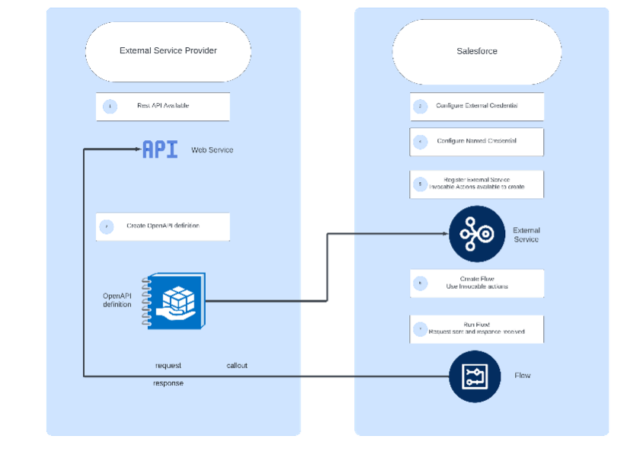
External Services bridge Salesforce with a plethora of external APIs, ranging from simple data retrieval services to complex business logic processors. This integration is not just about data exchange; it’s about creating a cohesive ecosystem where Salesforce acts as the hub, orchestrating and leveraging external functionalities seamlessly. This could mean pulling in real-time weather data to personalize customer interactions or integrating with financial systems for up-to-date billing information.
In the realm of customer relationship management, timely and relevant interactions are key. External Services can significantly enrich these interactions. For instance, by integrating with a social media API, Salesforce can provide insights into customer sentiments and trends, allowing businesses to tailor their communication strategies effectively. For our example, we will be integrating with WeatherAPI for access to its location data.
Setting Up External Services
Before we can get started, it’s important to know that to utilize External Services, you must have one of the required editions:
- Enterprise
- Performance
- Unlimited
- Developer
Once that is in order, the other key component is the external API documentation for the external service they intend to integrate. Since we are integrating with WeatherAPI, we will need to sign up for the service to utilize it. This gives us the key for the API. Weather API provides two ways of using their service, form an HTTP request to get weather from the API Explorer or use their NEW Swagger Tool. We will be utilizing Swagger. (You will need an account.) This information is used to configure the credentials.
In Salesforce, security is a top priority, so the method in which they ensure access to Salesforce is secure, External Services utilizes Named Credentials and External Credentials to maintain data security.
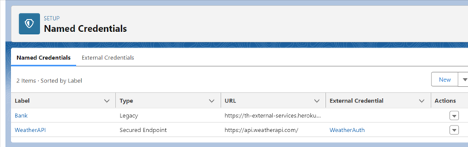
The External Credential specifies the authentication protocol – how two services will connect. The Named Credential is the endpoint-essentially the service you’re trying to connect to. Additionally, users will need a proper permission set or profile for authentication.
Here’s a video on how we do that for our example:
To recap:
- Setup the External Credential
- Give proper users access to the principal by way of profile or permission set
- Create the Named Credential
Now that the credentials have been set up, we can register the External Service.
And all of that was done without writing a line of code!
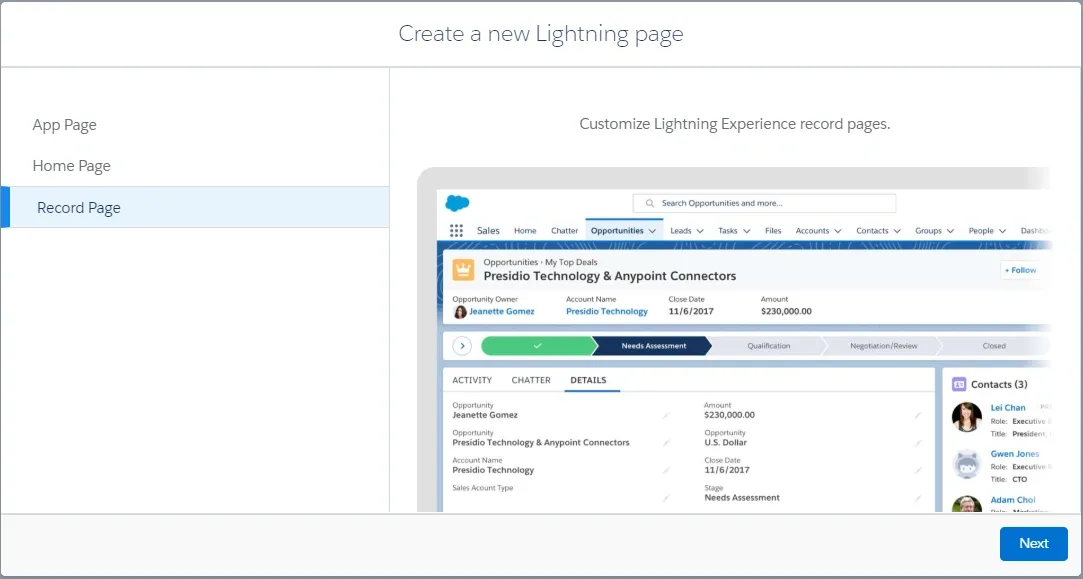
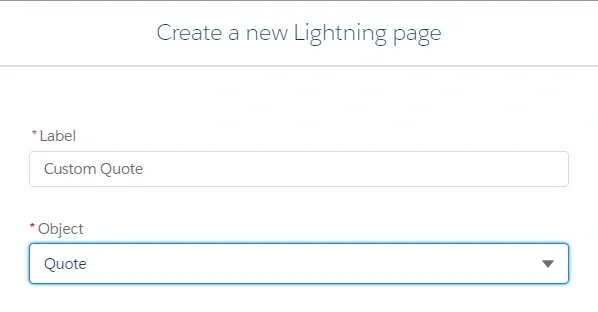
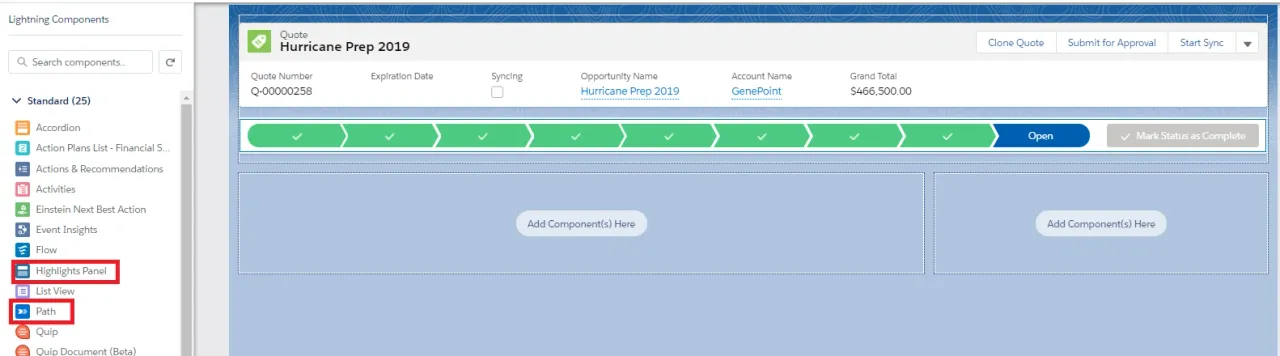
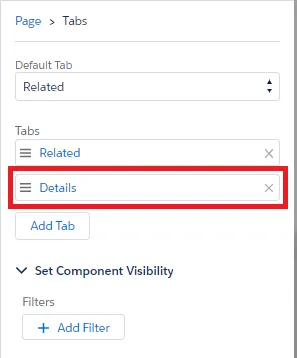
Implementing External Service Integrations in Salesforce Flows
Now that the external service has been configured, we can see a small glimpse into what it can do. For our example, we’ll call the WeatherAPI through a screen flow and retrieve location data from the external WeatherAPI that we populate on a record in Salesforce, based on the user’s input. Let’s get into it.
When the External Service is registered, it creates Invocable Actions. They allow external services to perform specific operations within the Salesforce when integrated. These actions are used to encapsulate Salesforce business logic and make it accessible to external applications, enabling actions like data updates or workflow triggers.
They are easy to call, accept inputs, and return outputs, facilitating seamless interaction between Salesforce and external systems. This feature is essential for automating processes and integrating diverse systems with Salesforce.
Check out the video on how we brought it all together:
Best Practices and Tips
To ensure reliable and efficient Salesforce External Service integrations, focus on robust error management through detailed logging, specific error messages, graceful degradation, and retry mechanisms. The API specs and documentation will usually have output for error, so use it! Optimize performance by managing data transfer efficiently, implementing caching, using throttling and pagination, and opting for asynchronous processing.
Additionally, maintain the health of the integration with proactive monitoring and continuous review, optimizing based on evolving needs and user feedback. These strategies are crucial for creating a seamless, user-friendly integration that enhances overall system functionality and resilience.
Conclusion
In wrapping up, it’s clear that integrating external services with Salesforce can significantly boost your workflow and data handling. These tools aren’t just add-ons; they’re game-changers, making Salesforce not just a CRM, but a central hub for all sorts of business processes. Remember, the key to success lies in handling errors smartly, keeping your data secure, and ensuring everything runs smoothly. We at Cloud First Labs encourage you to dive into the world of external services in your Salesforce setups. It’s a journey worth taking, and who knows what efficiencies and improvements you might uncover. Feel free to share how it goes for you or reach out if you hit any snags!
Talk to the Professionals!
To learn more about our Salesforce services, please visit our website or fill out a Contact Us form here.

Additional Resources
https://help.salesforce.com/s/articleView?id=sf.external_services.htm&type=5