
Overview – Automated Document Processing
MuleSoft IDP (Intelligent Document Processing) and MuleSoft RPA (Robotic Process Automation) can be used in tandem to handle a wide variety of document processing and automation tasks. MuleSoft makes it straightforward to integrate these capabilities seamlessly into a hyperautomation solution. This article and the accompanying video will work with the following automated document processing use case: a set of invoice PDF files is placed in a folder, and the RPA process must send each document to a preconfigured IDP Document Action, get the AI-and-OCR-scraped data back from IDP, and use that data in follow-up processing tasks. (For simplicity, this use case’s only follow-up processing is displaying IDP output data on the screen). In a real-world case, the RPA process could deliver the data to a Web form, a legacy system, or do countless other processing with the data. The diagram below shows the general flow:

Prerequisites
As prerequisites for the automated document processing, ensure that RPA Builder >= 6.6.0 is installed. Also, note that this walkthrough will not show the steps to create or configure the IDP Document Action. To see those steps (and the steps for generating a related Connected App), see our previous article “Getting Started with MuleSoft IDP” and the related video “Easily Integrate MuleSoft IDP with Your Mule API Ecosystem”.
RPA Builder Steps
The following sections contain the key steps in RPA Builder for integrating with MuleSoft IDP.
Submit Docs to IDP, Get Back Execution ID for Each
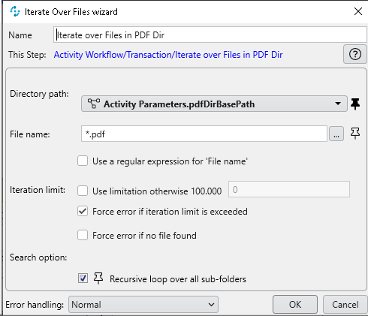
Create an activity parameter to hold the PDF directory base path (e.g. pdfDirBasePath). Create another activity parameter to hold the Connected App credentials (e.g. connectedAppCreds). Create a third activity parameter, an array, to hold execution IDs (e.g. executionIDs). Add those activity parameters into the workflow. Add an “Iterate over Files” action step and configure it to look in the PDF directory base path:
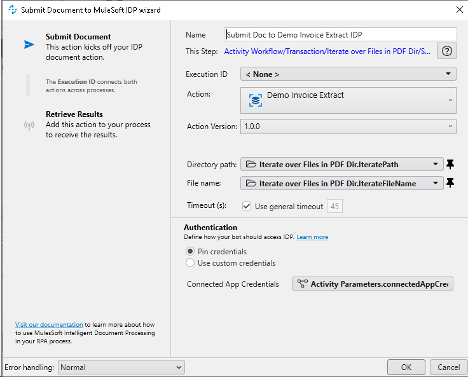
Within the File Iterator, add a “Submit Document to MuleSoft IDP” action step and configure the Action and Action Version as desired. Pin the connectedAppCreds from the activity parameter created earlier. When running, this step is what will start the IDP processing for the provided document:
Save the ExecutionId from the IDP action step to a variable named executionID:

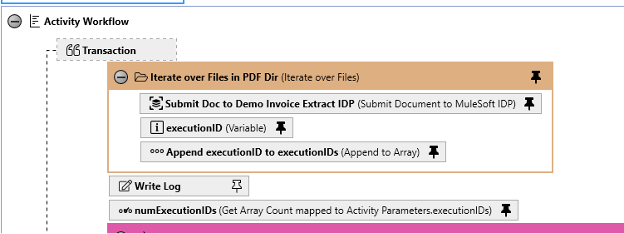
Add an “Append to Array” action step and append the executionID variable to the executionIDs array. After doing this, the Iterate over Files section should look like the screenshot below:
Immediately after the Iterate over Files, add a Get Array Count action step to count the number of IDs in the executionIDs array.
Loop over Execution IDs, Retrieve IDP Results for Each
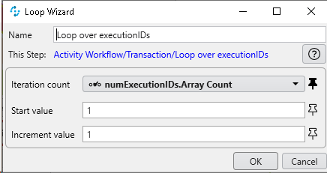
Add a Loop to loop over numExecutionIDs.Array Count:
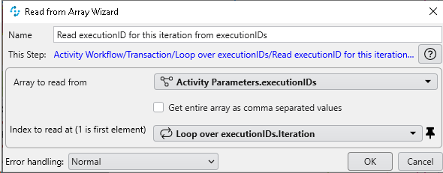
Within this Loop, add a Read from Array step to read the current iteration’s executionID from the array:
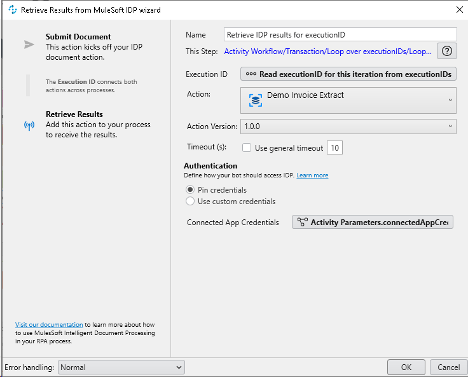
Then, within this Loop, add one more Loop. This inner loop should have a high number of iterations (e.g. 100) that we never intend to actually hit. This inner loop is used to continually check whether the IDP execution is in progress or if it is complete. Once it is complete, the inner loop will be broken and processing will move forward. To accomplish this, add a Managed block within the inner loop. In the DoAction section of the managed block, add a “Retrieve IDP Results from MuleSoft IDP” action step and configure it appropriately:
Following that, add a Check Value and have it compare the IDP result Status to IN_PROGRESS:
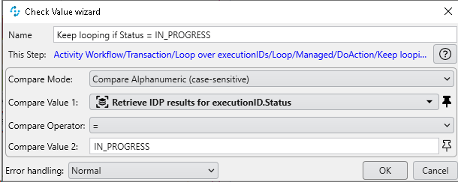
This means that the inner loop will continue if the processing is still IN_PROGRESS, but the inner loop will throw an error otherwise. So if it completes, an error will be thrown and the process will jump into the OnError section of the Managed Block. However, if it is IN_PROGRESS, the RPA should sleep for a few seconds before checking the status again:
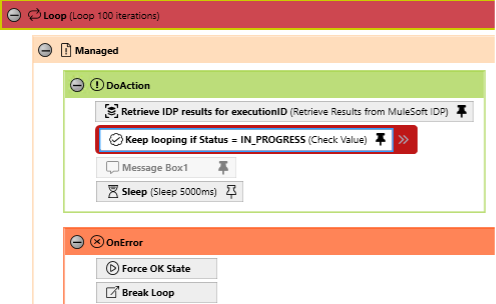
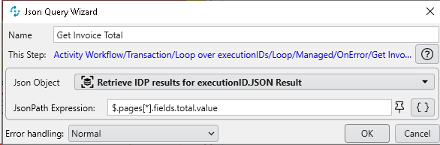
In the OnError section, add a Force OK State action step because it is not truly an error scenario when the Status changes from IN_PROGRESS (to either SUCCEEDED or MANUAL_VALIDATION_REQUIRED). After forcing the OK state, add a Break Loop action step. Also, any processing could be done with the data here. In this demonstration, the total is simply extracted using a Json Query action step:
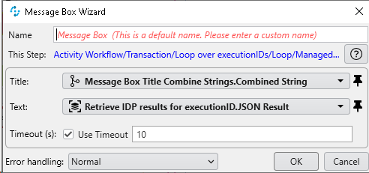
Then the total is displayed along with the full JSON content returned by IDP in a Message Box. (Again, in a real scenario, there would be additional processing executed here to deliver the data to the appropriate system(s)):
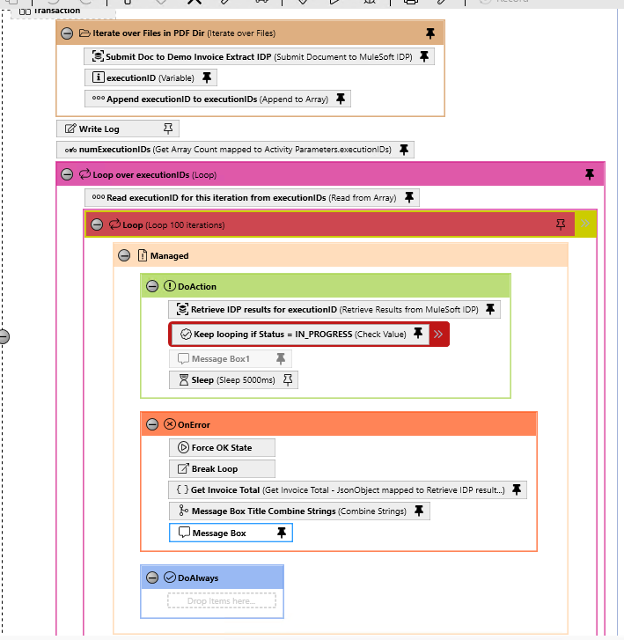
With this in place, the RPA is set up to successfully display the JSON output along with the parsed total. The full RPA workflow for the automated document processing looks like this:
See it in Action
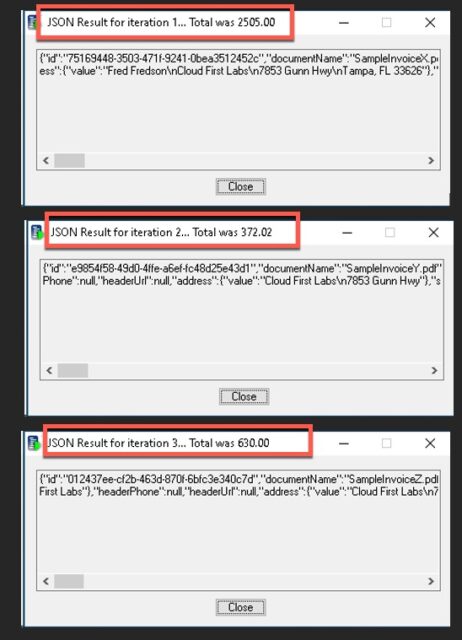
To see this in action, run the RPA workflow. As shown in the video and screenshots below, it successfully outputs both the invoice total (thanks to IDP correctly parsing it for each PDF) and the full JSON content:
I go into some more detail and explanation in the accompanying YouTube video for this automated document processing blog entry, and encourage you to check it out:
Conclusion – Your Automated Document Processing Made Easy
Go ahead and harness the power of MuleSoft Intelligent Document Processing (IDP) and Robotic Process Automation (RPA) to streamline your automated document processing workflows. Say goodbye to the tedious manual tasks and embrace a more efficient, automated solution that’ll save you tons of time and effort.
Talk to the Professionals!
To learn more about our MuleSoft IDP, MuleSoft RPA, Partner Manager and EDI, or Salesforce services, please visit our website or fill out a Contact Us form here.