
Overview – You aren’t stuck using the MuleSoft Sharepoint Connector
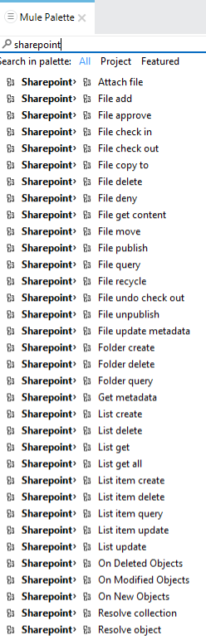
It is important to note that MuleSoft provides numerous other ways to integrate with Sharepoint; this post shows only one example. For example, if an organization has an Anypoint Platform subscription, a MuleSoft application can be used to easily monitor and/or integrate with Sharepoint using the handy and robust MuleSoft Sharepoint Connector. This connector has dozens of operations available to handle these needs.
But that’s easy, and we wanted to show the full functionality of MuleSoft and RPA processes that can be used to handle a wide variety of use cases and can be triggered from all sorts of common applications, and in this case, a MuleSoft RPA process that is triggered from Sharepoint by the creation or upload of a new file in a specific folder in Sharepoint.
If you’re a Sharepoint and MuleSoft shop, follow along with this post and see how an organization can be enabled to automate activities based on Sharepoint files and Power Automate, connecting to MuleSoft RPA without even needing to utilize the rest of the MuleSoft Anypoint Platform.
Set up Automation in Sharepoint
Create a New Power Automate Flow
Within Sharepoint, go to Integrate -> Power Automate -> See your flows :
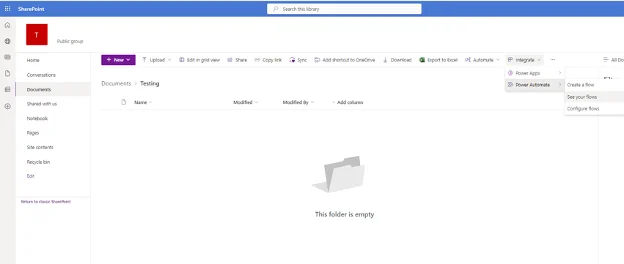
From there, click New flow -> Automated cloud flow.
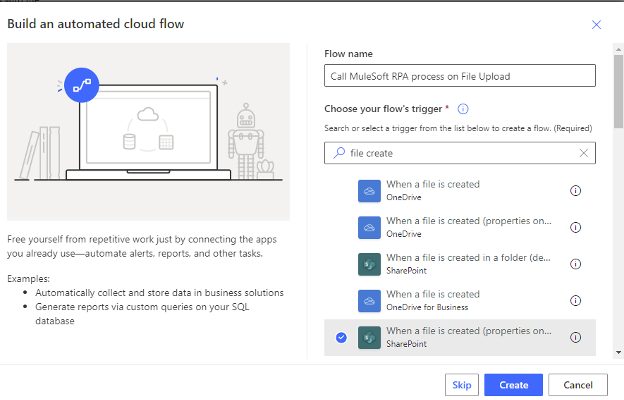
Our use case will be named ‘Call MuleSoft RPA process on File Upload’ and the trigger will be ‘Sharepoint – When a file is created (properties only)’.
Click Create:
Create Trigger Action
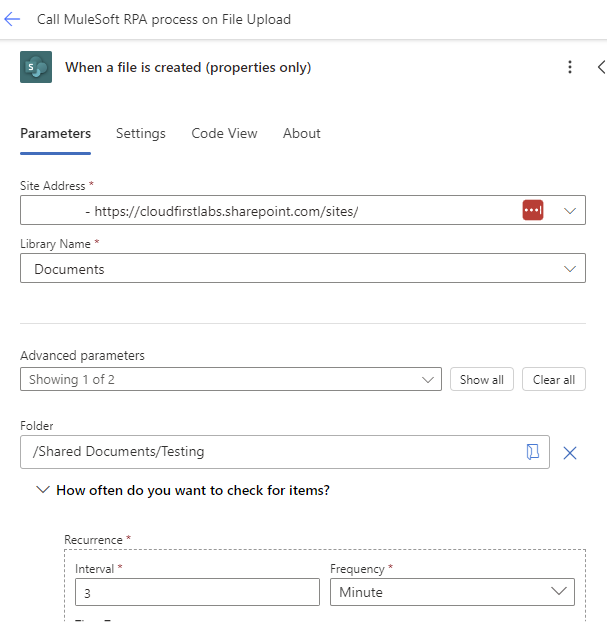
Click the auto-generated action step and set the Site Address and Library Name as desired. Under Advanced parameters, set a Folder name (e.g. /Shared Documents/Testing). By default, Power Automate will check for new files every 3 minutes:
Create HTTP Action for OAuth Call
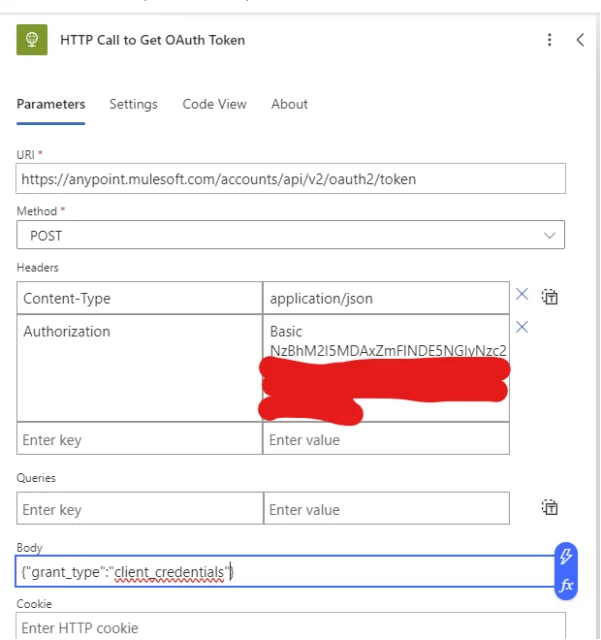
Add a new action underneath the trigger of type HTTP. This will be used to make an HTTP request to get an OAuth access token used to authenticate and authorize the call to the RPA API. For URI, set https://anypoint.mulesoft.com/accounts/api/v2/oauth2/token. For method, do POST. For Headers, add one for Content-Type = application/json. And add one more for Authorization = Basic <base64-encoded client_id:client_secret value>.
For Body, set a simple JSON payload of: {“grant_type”:”client_credentials”}:
Create Parse JSON Action for Getting OAuth Token from Response
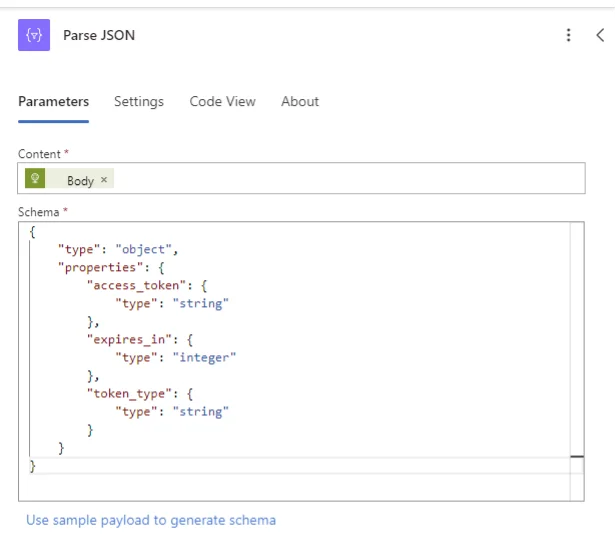
Add a new Action underneath the OAuth HTTP call. The Type should be “Parse JSON”. This is needed to be able to use the access_token from the previous HTTP step in the upcoming HTTP step for authentication.
Set Content = Body from the prior “HTTP Call to Get OAuth Token” step.
And for schema, use the “Use sample payload to generate schema” link and paste a sample payload into it to generate the appropriate JSON schema:
Create HTTP Action for RPA API Call
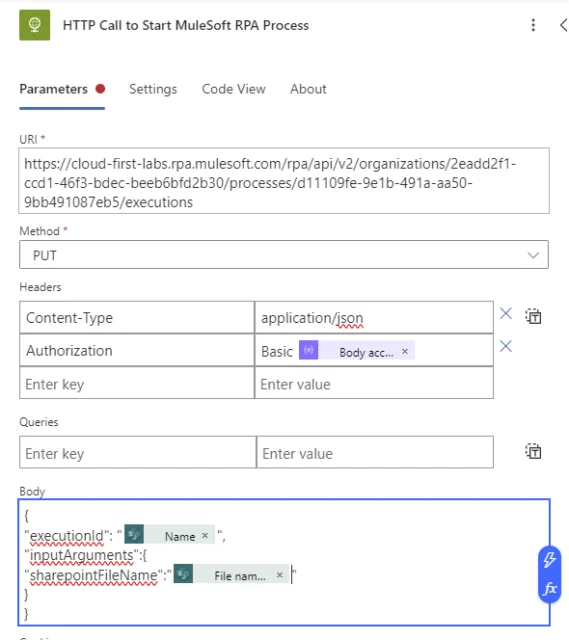
Finally, a step is needed to make the actual HTTP call to the MuleSoft RPA API URL. Get the URL from Anypoint Exchange after publishing the RPA process as an invokable run configuration in Production phase.
Set URI = <URL from Exchange>
Set Method = PUT
Create 2 headers. One should be Content-Type = application/json. The other should be Authorization = <“Basic ” + <Parse JSON – Body access_token>>
For Body, set executionId = <whatever ID is desired for identifying the RPA process execution> (in this case, Name from the trigger step is used). Then set any inputArguments as required. In this case, sharepointFileName is set equal to the “File name with extension” from the trigger step:
With this in place, the overall Power Automate flow should look like this and it can be saved:
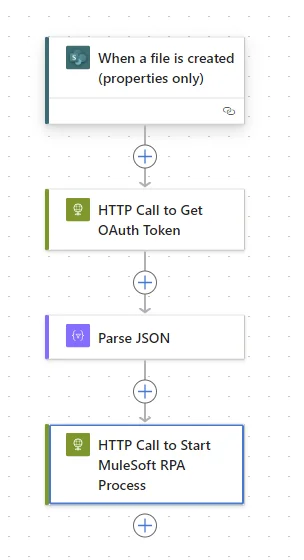
Upon saving, it can be tested. Alternatively, a file can be dropped in the configured location and the flow will trigger, calling the MuleSoft RPA.
See it in Action
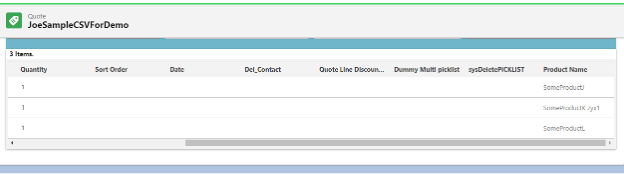
After uploading the screenshotted CSV file to that Sharepoint location, the RPA process was kicked off. It ran successfully, updating another application with the data from that CSV:

This is how easy it is to trigger a MuleSoft RPA process from Sharepoint instead of using the MuleSoft Sharepoint Connector! Part 2 of this post will contain the details on setting up the actual RPA process used here. For a guided tour of getting this set up, check out my YouTube video:
Talk to the Professionals!
To learn more about our MuleSoft RPA, MuleSoft and EDI, or Salesforce services, please visit our website or fill out a Contact Us form here.